Even reliable Samsung washers require maintenance, especially after 5-7 years of operation. The replacement of a hose, a rubber gasket or a drive belt is easy to perform. The replacement of the drum bearings of the Samsung washing machine may require effort, time, and money.
How to replace the bearing: before you start
If the bearing is broken, the only way to troubleshoot the problem is to replace it. The part is usually beyond repair.
Before the repair work get the right parts. Nowadays the market (shops, service centers, and Internet shops) offers a vast choice of bearings for all types of Samsung machines. The kit contains:
- actual bearings;
- oil seals;
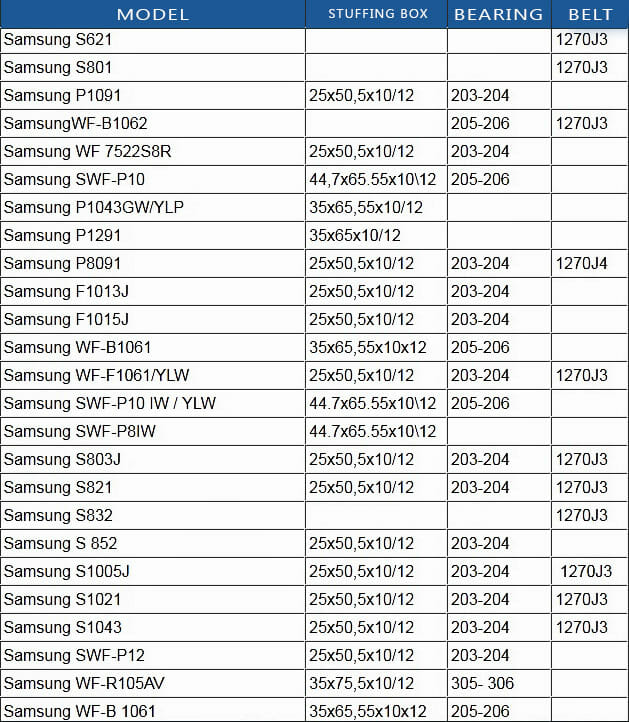
How to make sure you are going to buy the right kit? Provide a shop assistant with the exact type and year of production of your washing machine. We have the table of Samsung washer parts here for you:
How to take out the tub of the Samsung machine
Prepare a convenient place for you to disassemble the machine. Perhaps, your bathroom has little space. So, if possible, move the appliance to a workshop or a garage.
Next you need to remove the inconvenient details to take off the tub. You need to disassemble the washer part by part for you not to lose its parts and fasteners. That’s why, make sure to sort and keep in order everything you remove.
Follow the steps below to disassemble the housing:
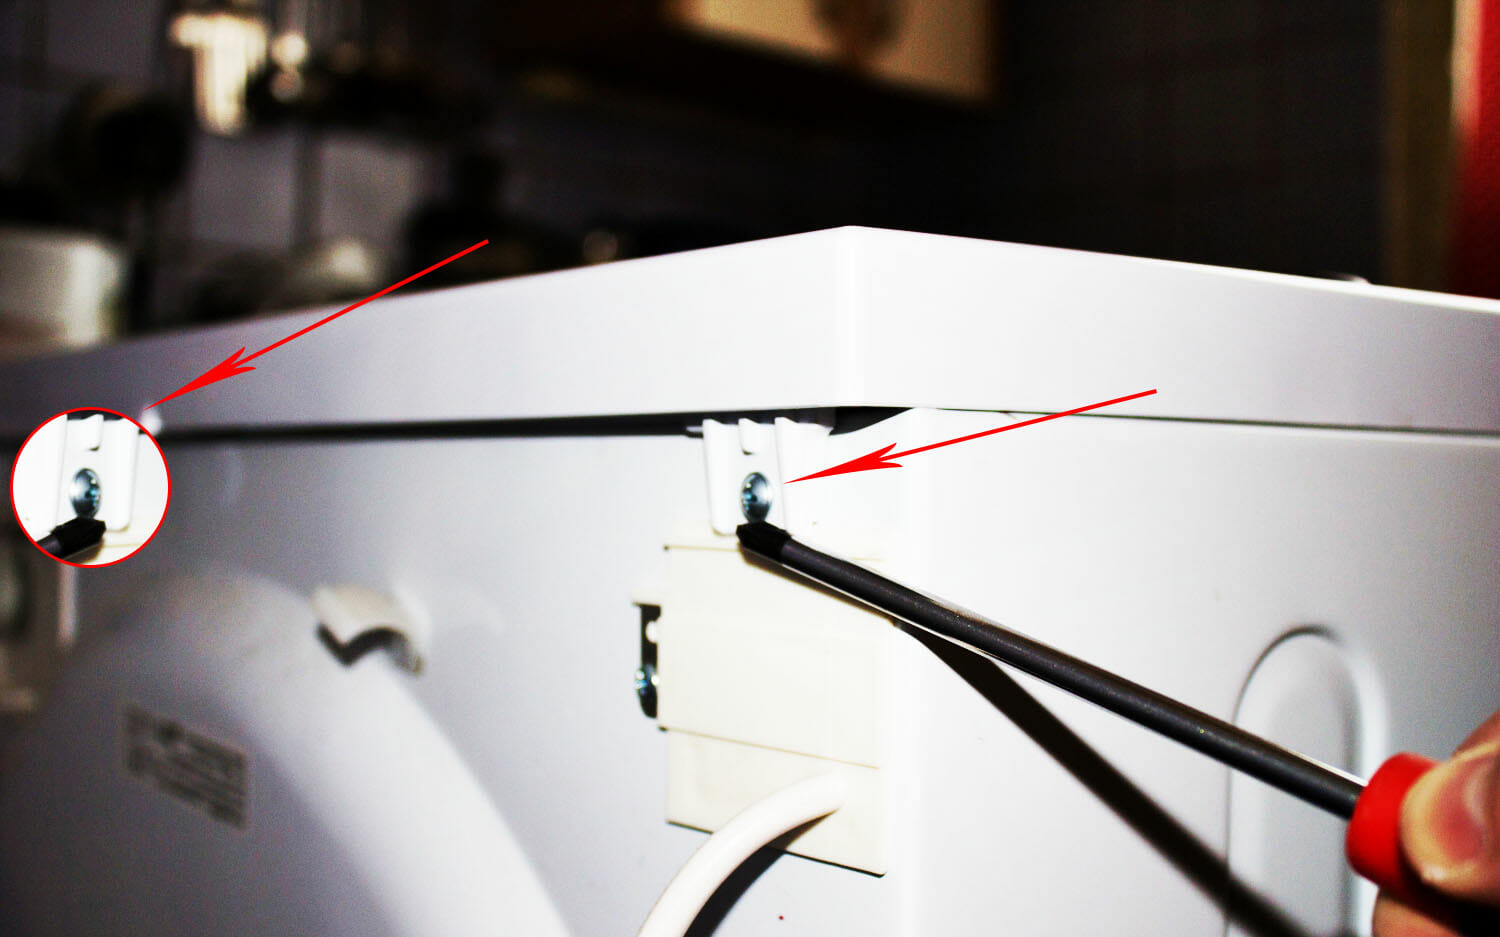
- Remove the top panel by unscrewing the two fasteners located at the corners at the back panel. Then grab the panel with both hands, swing the panel outward and then up.
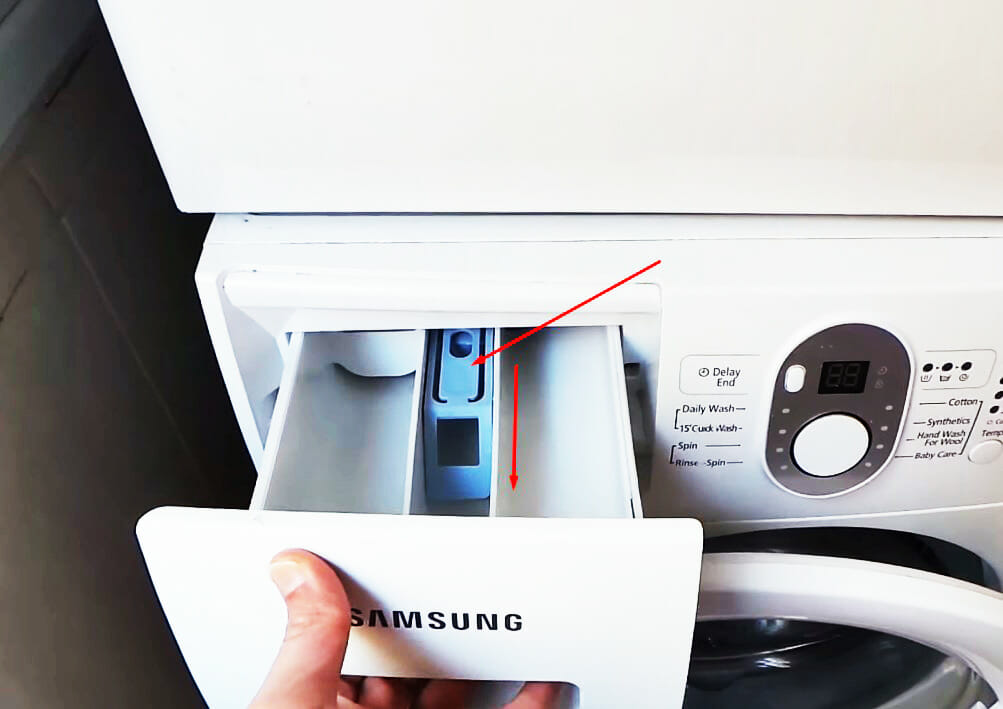
- Remove the detergent drawer.
It is easy to do:- pull out the drawer;
- push the button located in the middle of it;
- raise the drawer slightly with the other hand and swing it outward;
- After removing the detergent drawer, unscrew its fill hoses and the pipe connecting the drawer and the tub. Loosen the clamps using a pair of pliers.

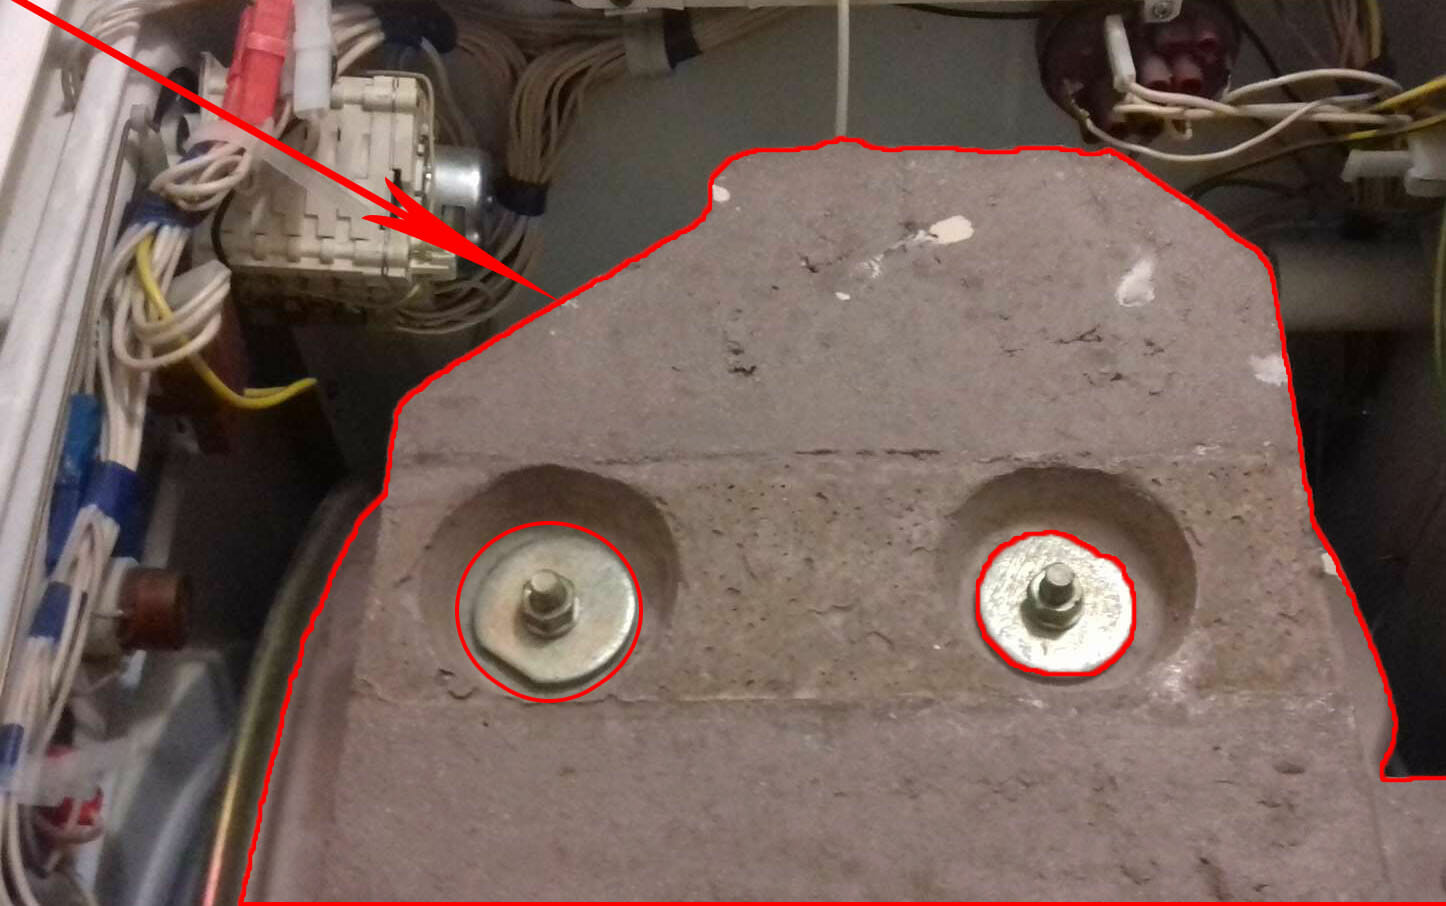
- Then you can see the counterweight at the top of the machine. It looks like a big brick or a stone. Choose the right cap to unscrew the fasteners.

- Then you need to take off the rubber gasket.
Removing the rubber gasket of the Samsung washing machine is not a big challenge:
- Unscrew the two bolts securing the lock assembly.
- Remove the switch in order not to damage the wiring while removing the rubber seal.
- Use a thin screwdriver to pry off the retaining ring.
- Find the spring moving the screwdriver under the ring. Release it.
- Loosen the screw and remove the retaining band.
- With your fingers under the rubber gasket, swing it outward.
You don’t need to remove the entire gasket – just enough to remove the front panel.
After that, place the machine on its side to access the bottom of the washer. Remove the bottom by unscrewing the 4 bolts securing it.
Then continue with the wiring:
- Locate the motor and the drain pump. Remove all their wiring. If possible, record the video of the disassembly process for you to reinstall all the wiring harness in the right order. If it is inconvenient for you, label all the wires using a marker.
Warning! The contacts connecting the wires to the sensors are very weak, so try not to damage them. If you find some burnt contacts or wires, replace them immediately.
Now you need to remove the armatures, otherwise you can not proceed with the bearing replacement on the Samsung washing machine. The ends of the armatures are secured to the tub on one side and the housing of the machine on the other side.
You don’t need to remove anything else at the bottom, except for the motor. The pump won’t obstruct your work. You only need to remove its hoses.
Let the washer be placed horizontally. It will facilitate your work while removing the inlet valve along with its hoses and sensors.
Remove the wiring connected to the valve and then unscrew the mounting bolts holding it. Remove the valve and put it aside. At last, remove the 4 springs, on which the tub hangs.
How to remove the panels
You only need to remove the side and the front cover to get into the tub. The control panel rests on the 5 bolts. You can easily remove the panel by unscrewing the bolts.
Our warning is to be careful and not to damage the control panel wiring. Some ten fasteners hold the front panel in place. Find and unscrew them all. Remove the cover and put it aside. By the way, you can see another counterweight under the front panel – smaller than the main one. Take a socket wrench and unscrew the weight.
Now nothing prevents you from getting out the tub. Take out the motor and the tub. It is important not to damage the wiring and other sensitive components as it will elongate the repair work.
- Flip over the tub.
- Remove the drive belt from the pulley.
- Loosen the pulley with a hex key. If the pulley is tight, apply a little bit of WD-40 for you not to break the bolt.
How to split the tub
Since you have already removed the armature, you need to remove only clips and staples. Your tools will help you. This is an easy job with no special nuances and challenges.
Take off the top part of the tub housing to reveal the drum. Then remove the bottom part. As a result of these manipulations, you will get:
- The top part of the tub with the hatch opening at the center.
- The bottom part of the tub with the heater attached.
- The drum and the shaft.
If you wish, you can check the inside part of the tub for damage and the heater for dirt, limescale, short-circuit and housing breakage. Use a tester for the last two checks. If you have found problems with the heater, you can remove limescale deposits or replace the part.
How to install the new bearings on the Samsung machine
Before you replace the bearing on the washing machine, you need to get the old one. Follow the next steps:
- Find 2 various size bearings in the tub bush.
- You need to tap it from the outside towards the tub with a mallet and a pin to free the bearing.
- You can get the small bearing by tapping it from the inside of the tub.
- Get a pin, put it to the edge of the bearing and lightly tap on it with a hammer. Put the pin to the other edge and lightly tap on it with a hammer again. Proceed with tapping on the pin along the bearing edge until you loosen the bearing.
Attention! Always choose several points for tapping while releasing the part – at least 3 points. Otherwise the bearing will come out crooked or may get stuck in the bush. As a result, you will waste some time solving the problem.
By the way, you can remove the bearings at any vehicle workshop. The workers have special pullers there. So, if possible, contact the professionals. They usually do this kind of work for a nominal fee.
Don’t forget about the oil seals:
- remove the worn elements;
- clean debris from the bush by rubbing the surface with a piece of cloth;
- lubricate the new seals with the grease that comes with the bearings;
- install the seals.
Then you can put the bearings in place. Take the following steps:
- install the detail in the bush and use your fingers for it to settle;
- put a wooden block on the other bearing;
- tap it a few times with a mallet until the part fits its housing.
Home repairmen common mistakes
Here we list typical mistakes made by DIY enthusiasts, so that you can learn from their experiences. Home repairmen often:
- damage the door lock assembly wiring;
- tear the rubber gasket;
- damage the pulley, removing it from the shaft;
- break the mounting bolts;
- damage the wiring of the temperature sensor or the heating element;
- tear off the pipes if they fail to remove or loosen the clamps beforehand;
- break the bush while tapping out the bearings (in this case you need to change the drum).